|
| |||
TroubleshootingCharger detection
If you don’t get the charger showing in the mainscreen, do the following:
1. Make sure you have firmware 5.0 or later. This is displayed on the Charger screen when you switch it on. 2. Stop the program, unplug the USB cable, turn the charger off and then on again, plug in the USB cable, and restart the program. 3. If it still doesn’t find it, go to the File menu and run the Re–Initialize chargers (run startup again) routine.
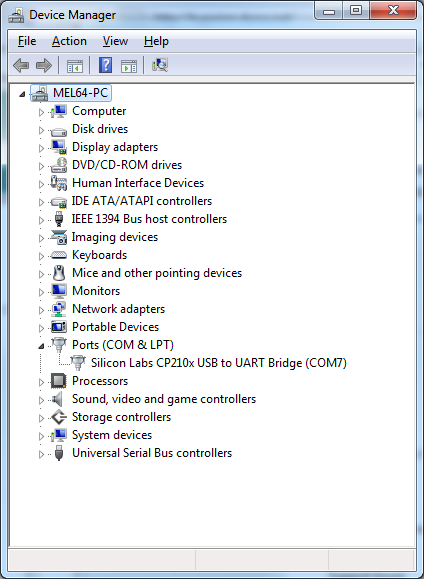
If you still have trouble, make sure your charger is showing up in the "Windows Device Manager", under COM Ports. If you don’t know where Device Manager is, see this http://pcsupport.about.com/od/tipstricks/f/finddevmngr.htm for a description for various versions of Windows.
It will look something like this (COM 1 and COM2 are commonly reserved by Windows for the two physical serial ports whether they exist or not, so COM3 is the normal first additional port assignment):
COM port issues
Using multiple COM ports under Windows with USB/Serial conversion can be tricky. Modern computers generally do not have physical serial ports any more so the software “sees” the serial port through the USB/Serial conversion interface of the charger. Sometimes if there is more than one serial device there can be a conflict. This is a Windows issue not a problem with the software. The software simply requires a separate COM port for each physical charger.
Normally, for a single charger, the COM port which is set up by default by Windows when you plug in the USB adapter is detected automatically and there is no issue. However, particularly if you want to use multiple chargers, Windows sometimes sees two identical conflicting devices. The automatic routine should take care of this but you may need to manually assign different COM ports to the different chargers. If you need to manually specify what COM ports is assigned to each charger for the software to look at you can do that.
1. Under File menu manually add which COM ports to scan. Use Windows Device manager to find out what they are. 2. Then start the program using the Manual COM port selection option.
Note for experts: During startup the HyperionSuite program default checks all connected units to determine if they have a generic Serial ID, if so it will change it to prevent conflicts. You can disable this if you want by adding NOCP210 as a command line argument at startup.
Multiple chargers To run more then 1 charger off a USB hub you need to have a Powered USB Hub. Please note that many USB Hubs do not support more then 2-3 chargers even though they are powered, we have found that the Belkin brand of USB hubs are good to support multiple chargers. The software has been tested with >7 chargers on a Belkin hub.
Charger not found There are other programs that might interfere with the chargers and lock their COM Ports, The Sony Ericsson Phone suite and Nokia Suite are known to cause such problems. If you find yourself missing a charger or cannot find any charger at all, make sure all extra programs that use a serial connection are shut down.
Mac issues This is Windows software but has been tested successfully in a virtualised environment using Parallels and Fusion. It also works under BootCamp. Setting up the serial ports is straightforward. Plug in the USB cable and just select the virtual windows machine rather than the Macintosh when asked where you want to install the USB port. Multiple chargers on a Mac have not been tested but the principles for multiple COM ports under Windows should apply.
BSOD issues (Blue screen of death crashing)
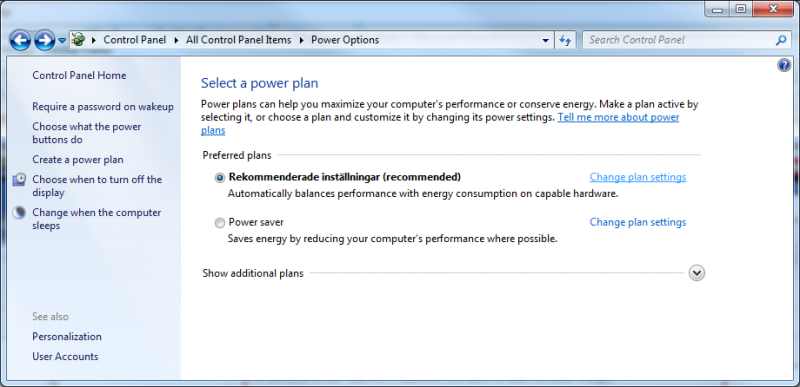
It can help to disable power save mode on the USB. To disable selective USB power save do the following steps in the Control Panel -> Power Options
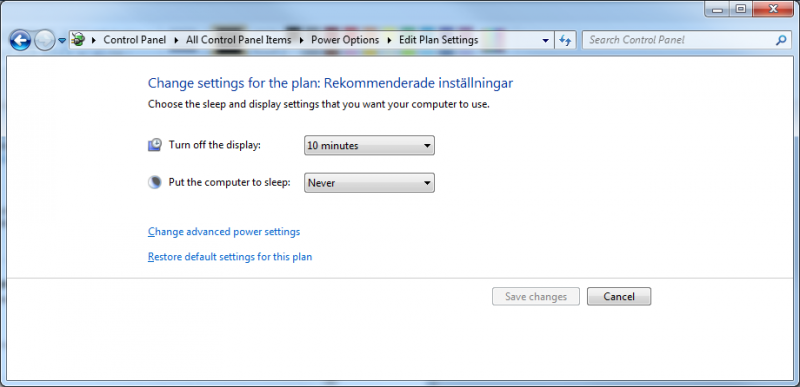
Click on Change Plan settings
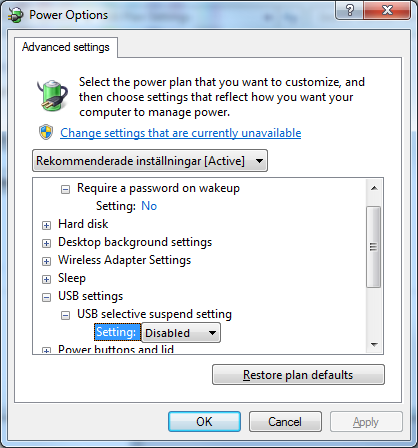
Then press on the Change advanced Power settings
Browse down to USB settings and USB Selective suspend setting and then select Disable on the setting and press Apply.
|


